link server 2010 installtion step by step


3. RSAT Tools (Features > Add Features > Remote Server Administrative Tools > AD DS andLDS Tools) > Next > Install > Close > Select Yes to Reboot > Post Reboot Installation will continue > Close.

4. Have a Certification authority set up in your domain. OR a certificate ready for the Lync Server to import.

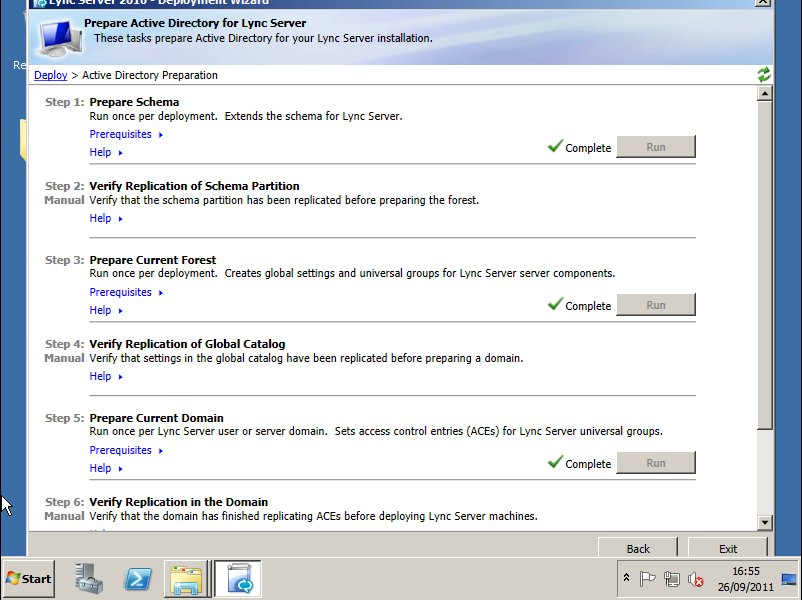
5. Prepare Schema > Run > Next > Finish.
6. Allow domain replication.
7. Prepare Current Forest > Run > Select Local Domain > Next > Finish.
8. Allow domain replication.
9. Prepare Domain > Run > Next > Finish.

10. When all are completed, add your administrators to the newly created AD group CSAdministrators > Then click "Back" to return to the main page of the Deployment Wizard.

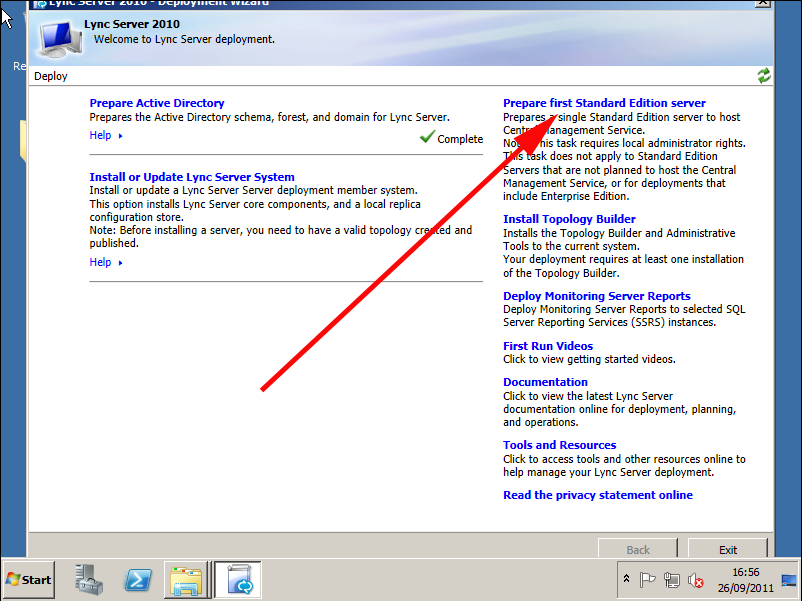
11. Prepare First Standard Edition Server > Next > SQL Express will install > Finish.

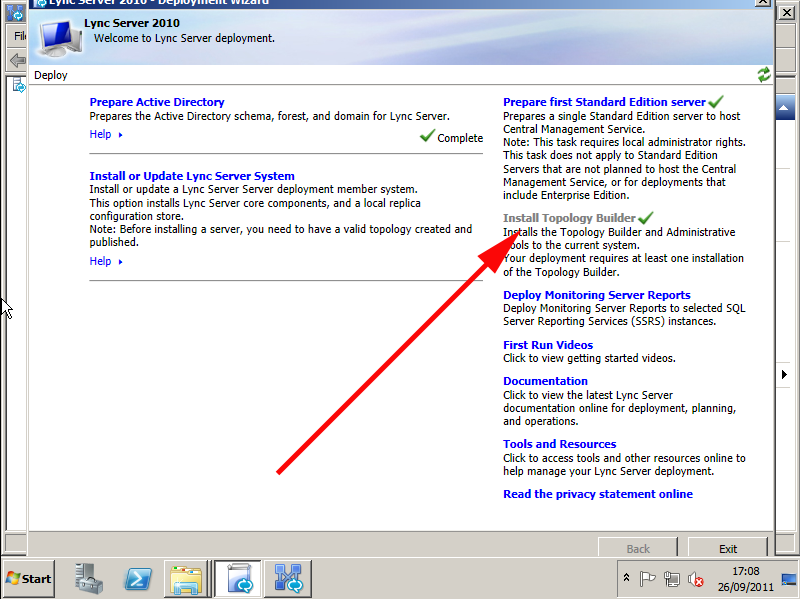
12. Install Topology Builder > It installs very quickly and gets a green tick when complete.

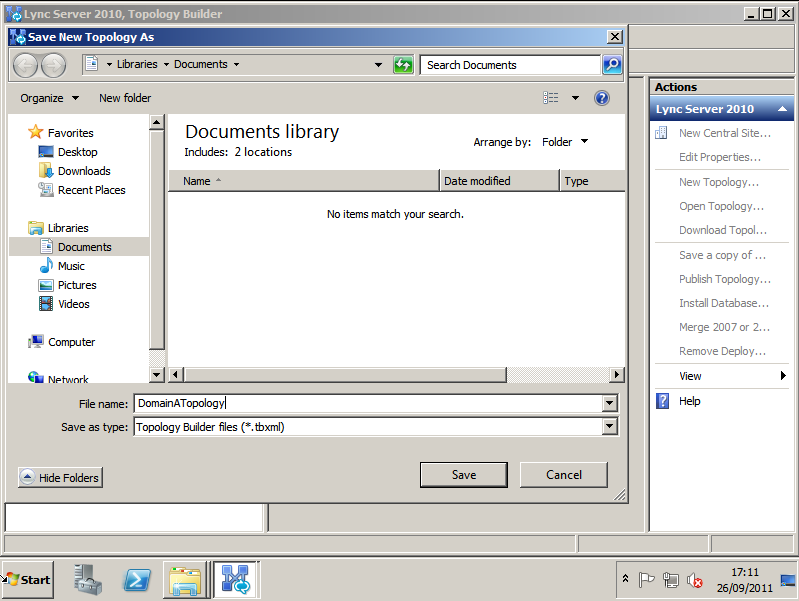
13. Start > All Programs > Microsoft Lync Server 2010 > Lync Server Topology builder > When promoted select > New Topology > OK.

14. Save the topology as requested.

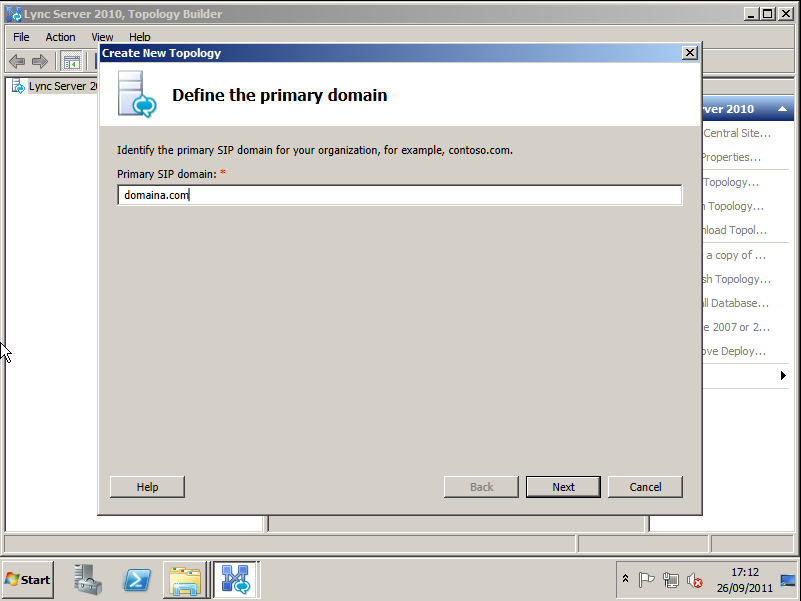
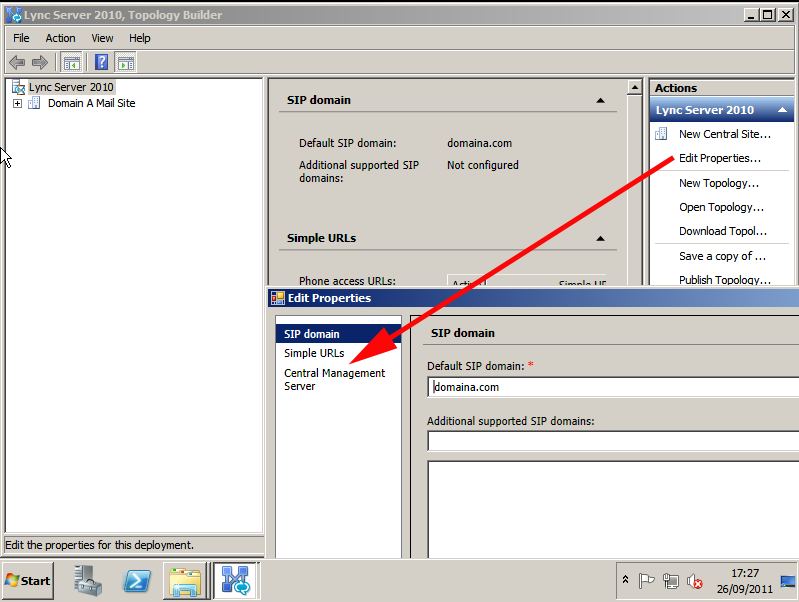
15. Under "Primary SIP Domain" > enter your domain name > Next.

16. Enter any additional domains if required > Next.

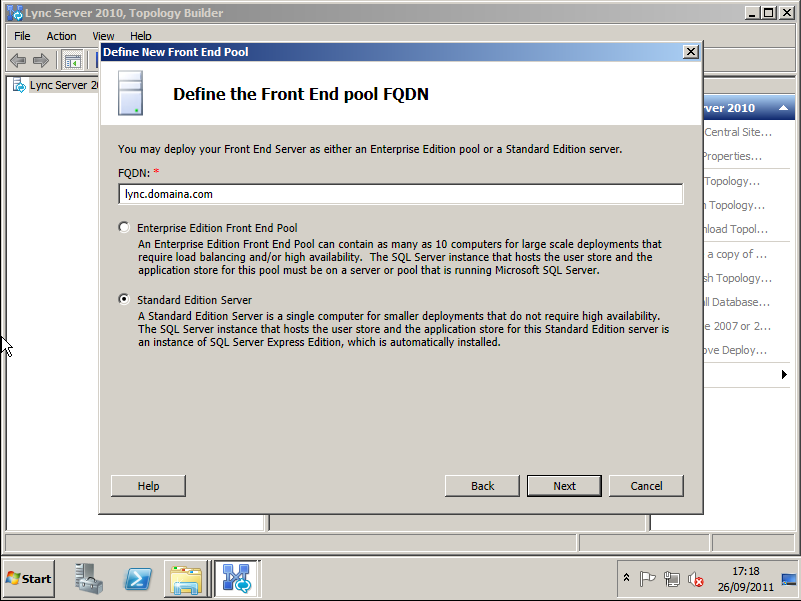
13. At the "Define a new front end pool" wizard > Next > Enter the FQDN of the server and select Standard Edition > Next.


Pre-Requisites
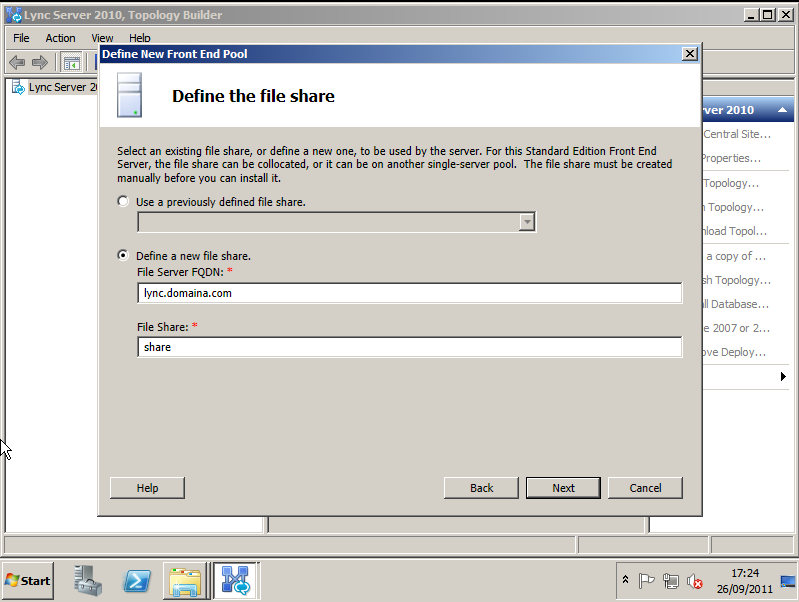
1. Download and install, Microsoft Silverlight. (link)
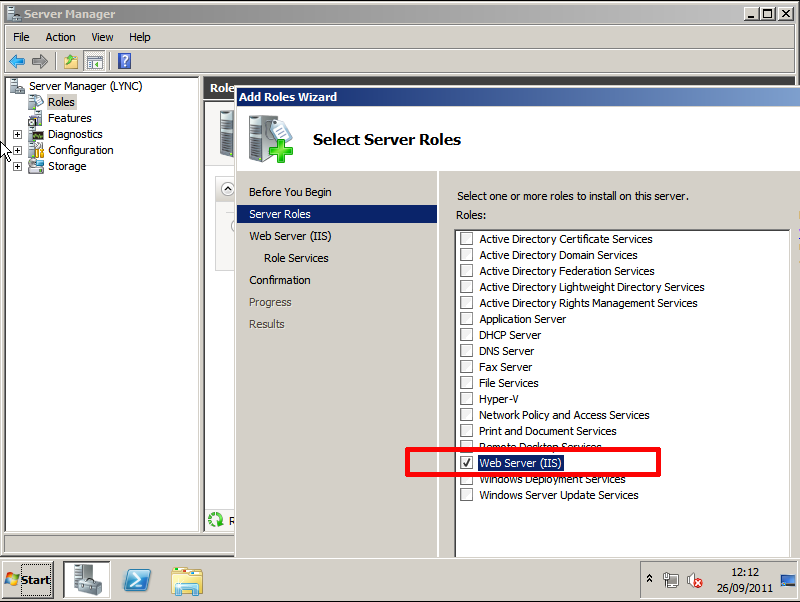
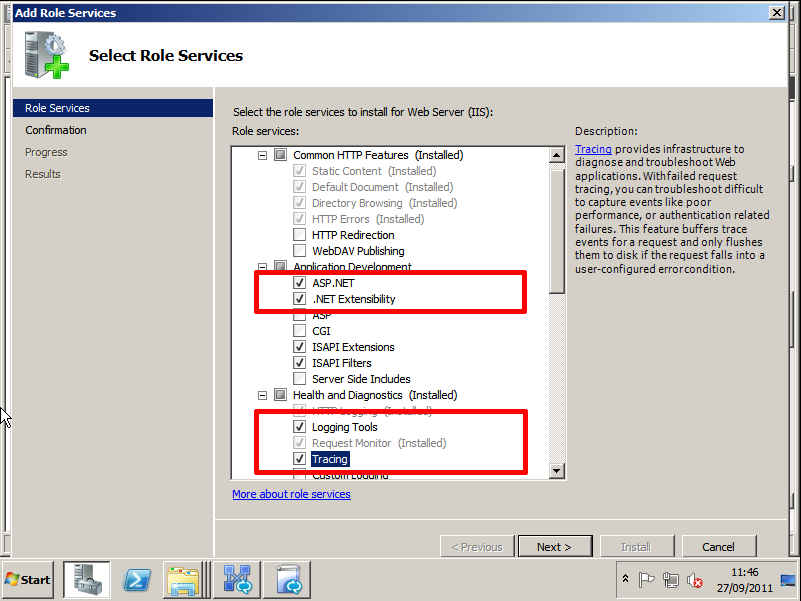
Also add:
i. ASP.NET
ii. Logging Tools
iii. Tracing
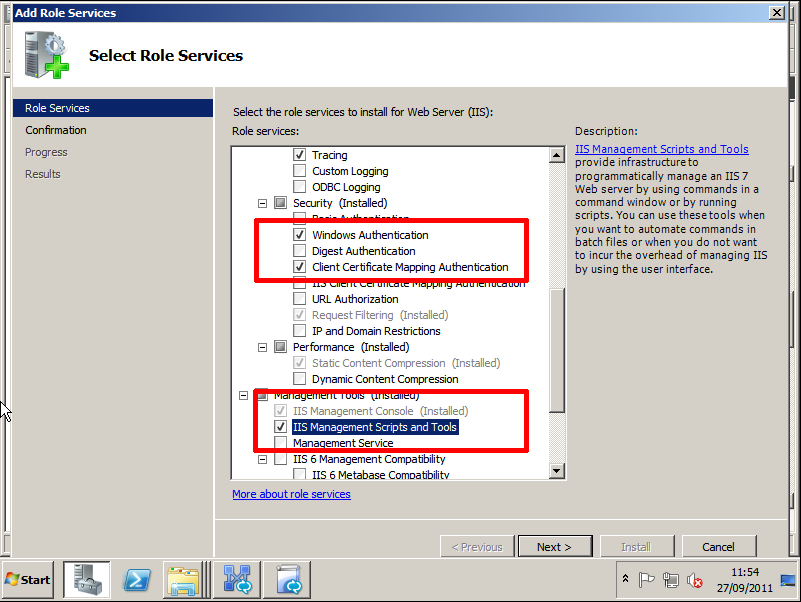
iv. Client Certificate Mapping Authentication.
v. Windows Authentication
vi. IIS Management Scripts and Tools
ii. Logging Tools
iii. Tracing
iv. Client Certificate Mapping Authentication.
v. Windows Authentication
vi. IIS Management Scripts and Tools
Next > Install > Finish.
3. RSAT Tools (Features > Add Features > Remote Server Administrative Tools > AD DS andLDS Tools) > Next > Install > Close > Select Yes to Reboot > Post Reboot Installation will continue > Close.

4. Have a Certification authority set up in your domain. OR a certificate ready for the Lync Server to import.
Install
1. Run Setup > It will ask to Install C++ let it do so.
2. Once it's finished, It will ask for the install location > change if required > Install.
3. Accept the EULA > OK.
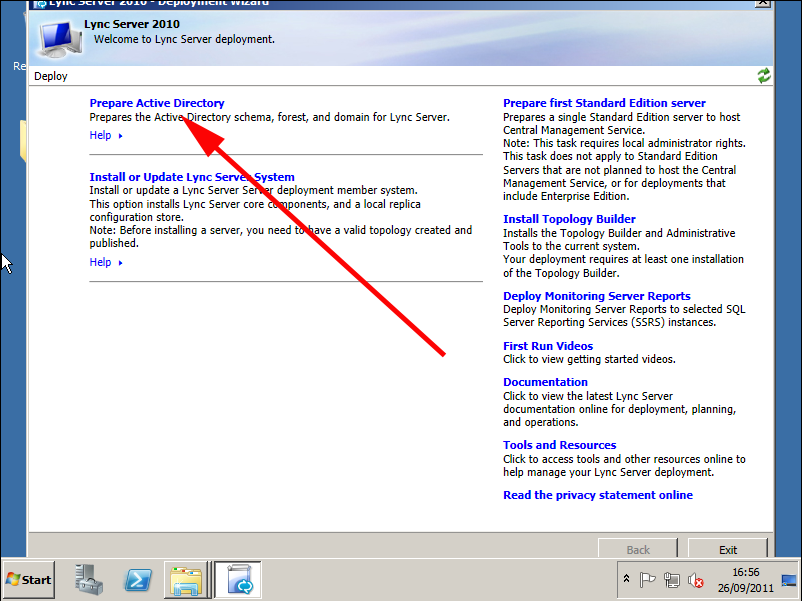
4. When the Deployment Wizard starts > Select "Prepare Active Directory".
2. Once it's finished, It will ask for the install location > change if required > Install.
3. Accept the EULA > OK.
4. When the Deployment Wizard starts > Select "Prepare Active Directory".
5. Prepare Schema > Run > Next > Finish.
6. Allow domain replication.
7. Prepare Current Forest > Run > Select Local Domain > Next > Finish.
8. Allow domain replication.
9. Prepare Domain > Run > Next > Finish.
10. When all are completed, add your administrators to the newly created AD group CSAdministrators > Then click "Back" to return to the main page of the Deployment Wizard.

11. Prepare First Standard Edition Server > Next > SQL Express will install > Finish.
12. Install Topology Builder > It installs very quickly and gets a green tick when complete.
13. Start > All Programs > Microsoft Lync Server 2010 > Lync Server Topology builder > When promoted select > New Topology > OK.

14. Save the topology as requested.
15. Under "Primary SIP Domain" > enter your domain name > Next.
16. Enter any additional domains if required > Next.
11. Give the site a name and description > Next.
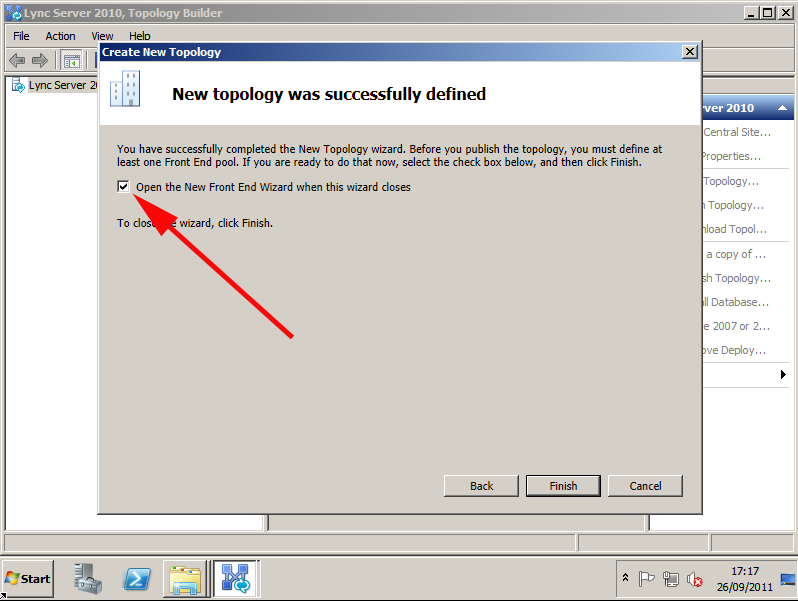
12. Enter site details > Next > With the option to "Open the new front end wizard.." selected > Finish.
13. At the "Define a new front end pool" wizard > Next > Enter the FQDN of the server and select Standard Edition > Next.
15. Choose to Collocate Mediation Server > Next.
16. Don't add any further server roles > Next > Next.
17. Let it create a new share > Next.
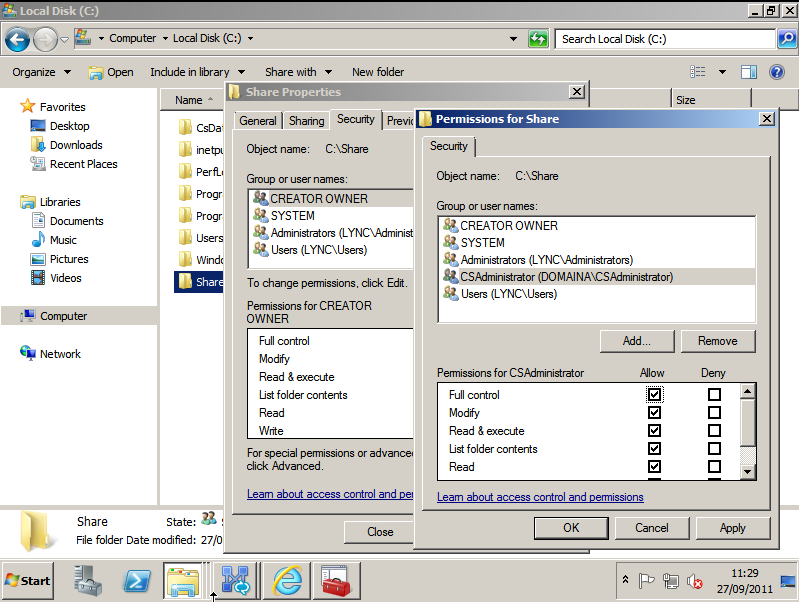
(Note manually create the share and make sure it has appropriate permissions).
16. Don't add any further server roles > Next > Next.
17. Let it create a new share > Next.
(Note manually create the share and make sure it has appropriate permissions).
18. Set external URL if required > Next > we are not adding PSTN > Finish.
19. On the Topology Builder Select > Edit Properties > Central Management Server.
19. On the Topology Builder Select > Edit Properties > Central Management Server.

21. Select Publish Topology > Next > Next > Finish.

22. Re-launch or swap back to the Lync Server Deployment Wizard > Select Install or Update Lync Server System.

24. Run step one "Install Local Configuration Store" > Select "Retrieve directly..." > Next > Finish.
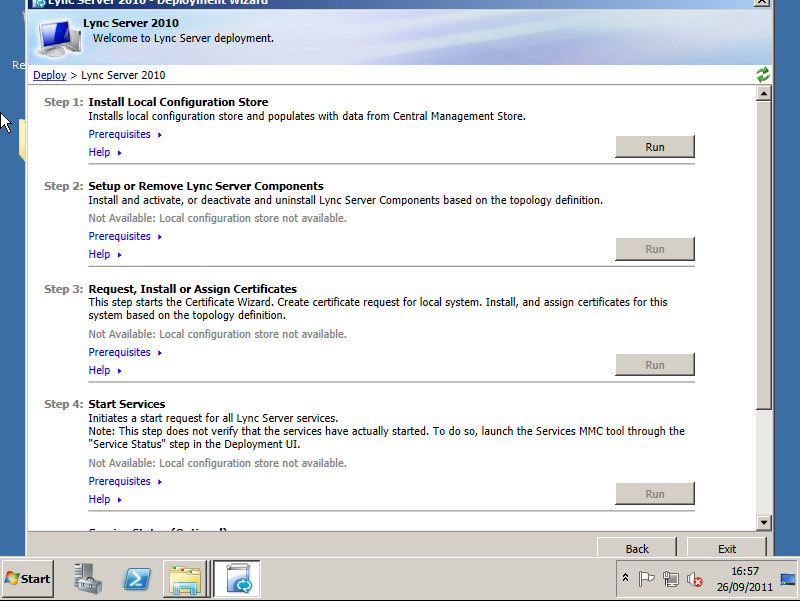
25. Run Step two "Setup or Remove Lync Server Components" > Next > (If you get aPrerequisite installation failed: Wmf2008R2 click the link) > Finish.
26. Run Step three "Request, Install, or Assign Certificates" > Request > Next > Send request immediately > Next.
26. Run Step three "Request, Install, or Assign Certificates" > Request > Next > Send request immediately > Next.
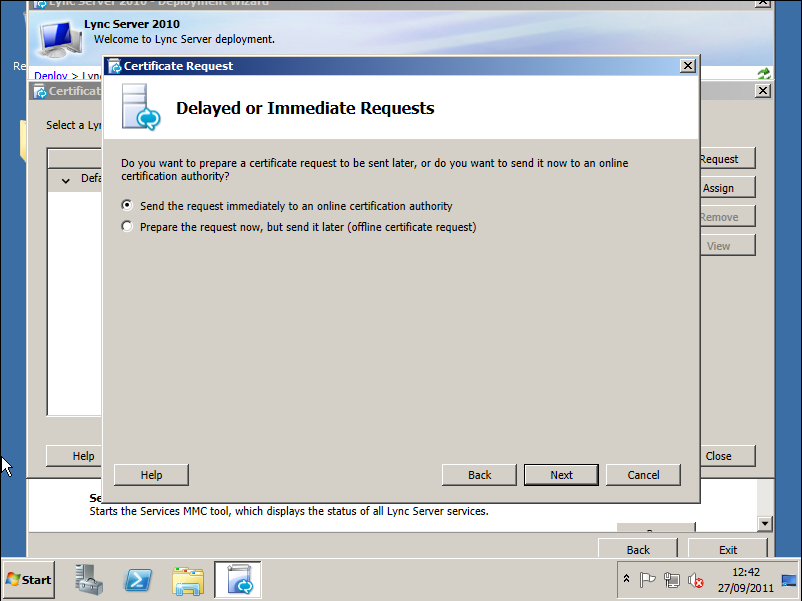
27. Select your CA > Next > Next > Next.
28. Choose a friendly Name > Next.
28. Choose a friendly Name > Next.

29. Fill in your Organisation information > Next > Enter country > State and City > Next > Next > Next > Next > Next > Next > Finish. > Close.
30. Run Step 4 "Start Services" > Next > Finish.
30. Run Step 4 "Start Services" > Next > Finish.
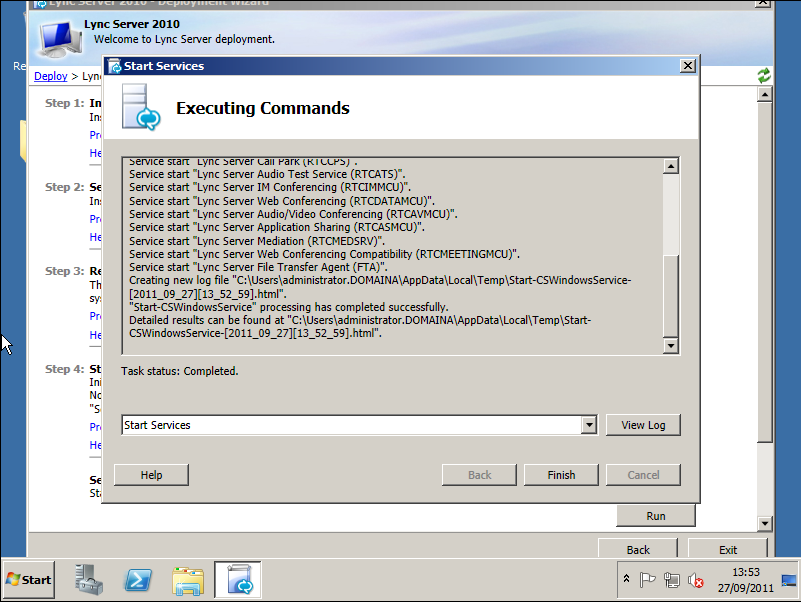
31. Check the service status if you wish.
32. Close the deployment wizard.
32. Close the deployment wizard.
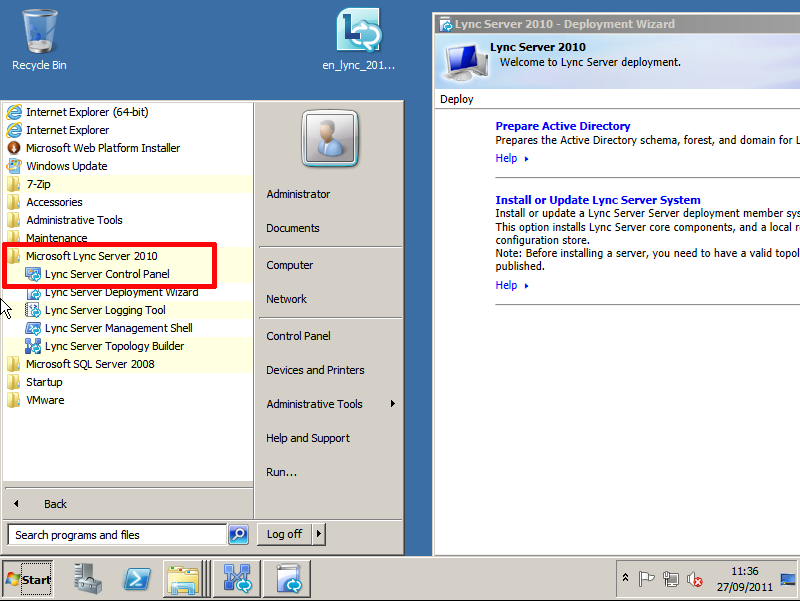
Launch "Lync Server control Panel" and Configure
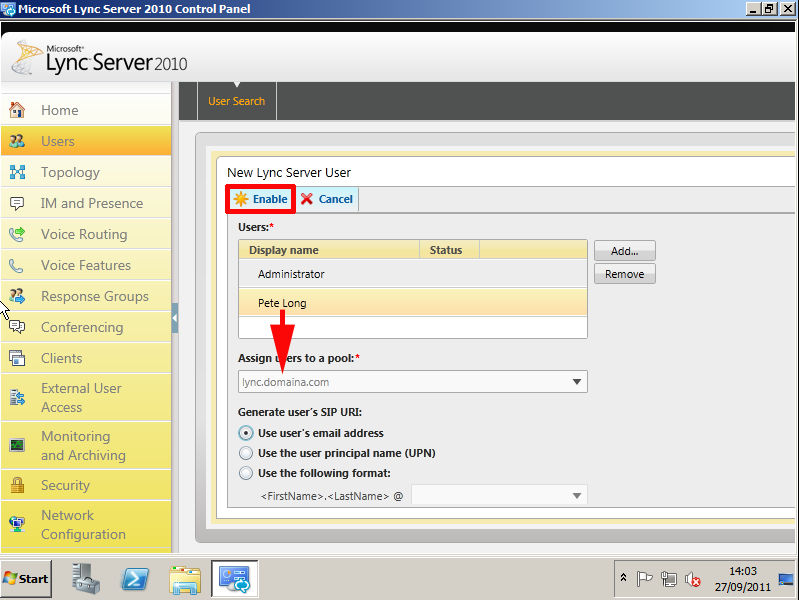
1. Launch the " Lync Server Control Panel" > Log in with an admin account (created above at step 10).
2. Navigate to Users > Add.

3. Add in your users and assign them to your pool.

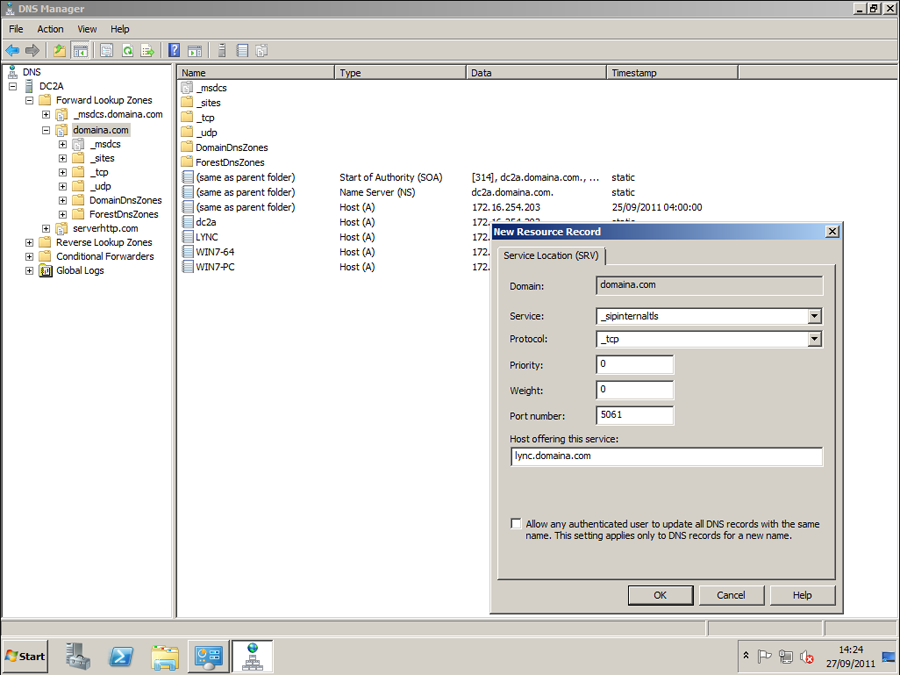
Post Install Tasks
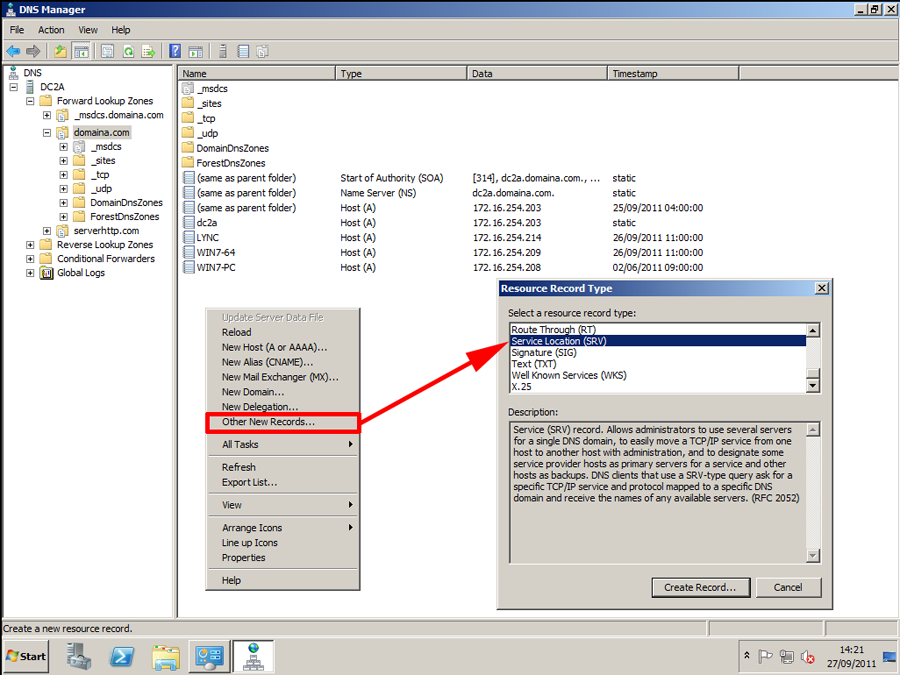
i. service: _sipintenaltls
ii. Protocol: _tcp
iii. Port Number: 5061
iv. Host offering service: the FQDN of the Lync Server.
ii. Protocol: _tcp
iii. Port Number: 5061
iv. Host offering service: the FQDN of the Lync Server.
Install the 'Lync Client' on the client machines.

No comments:
Post a Comment